Fixing Spam on WordPress
Posted on:
As if spam wasn't already infiltrating enough areas of our lives - in our letter boxes, on our phones in our emails - it's now in our website contact forms. But as much as I would like to earn millions of dollars through a cryptocurrency, I'd also like to keep my contact form to legitimate submissions, thankfully %WordPress has a few options for this.
Akismet Anti Spam Plugin
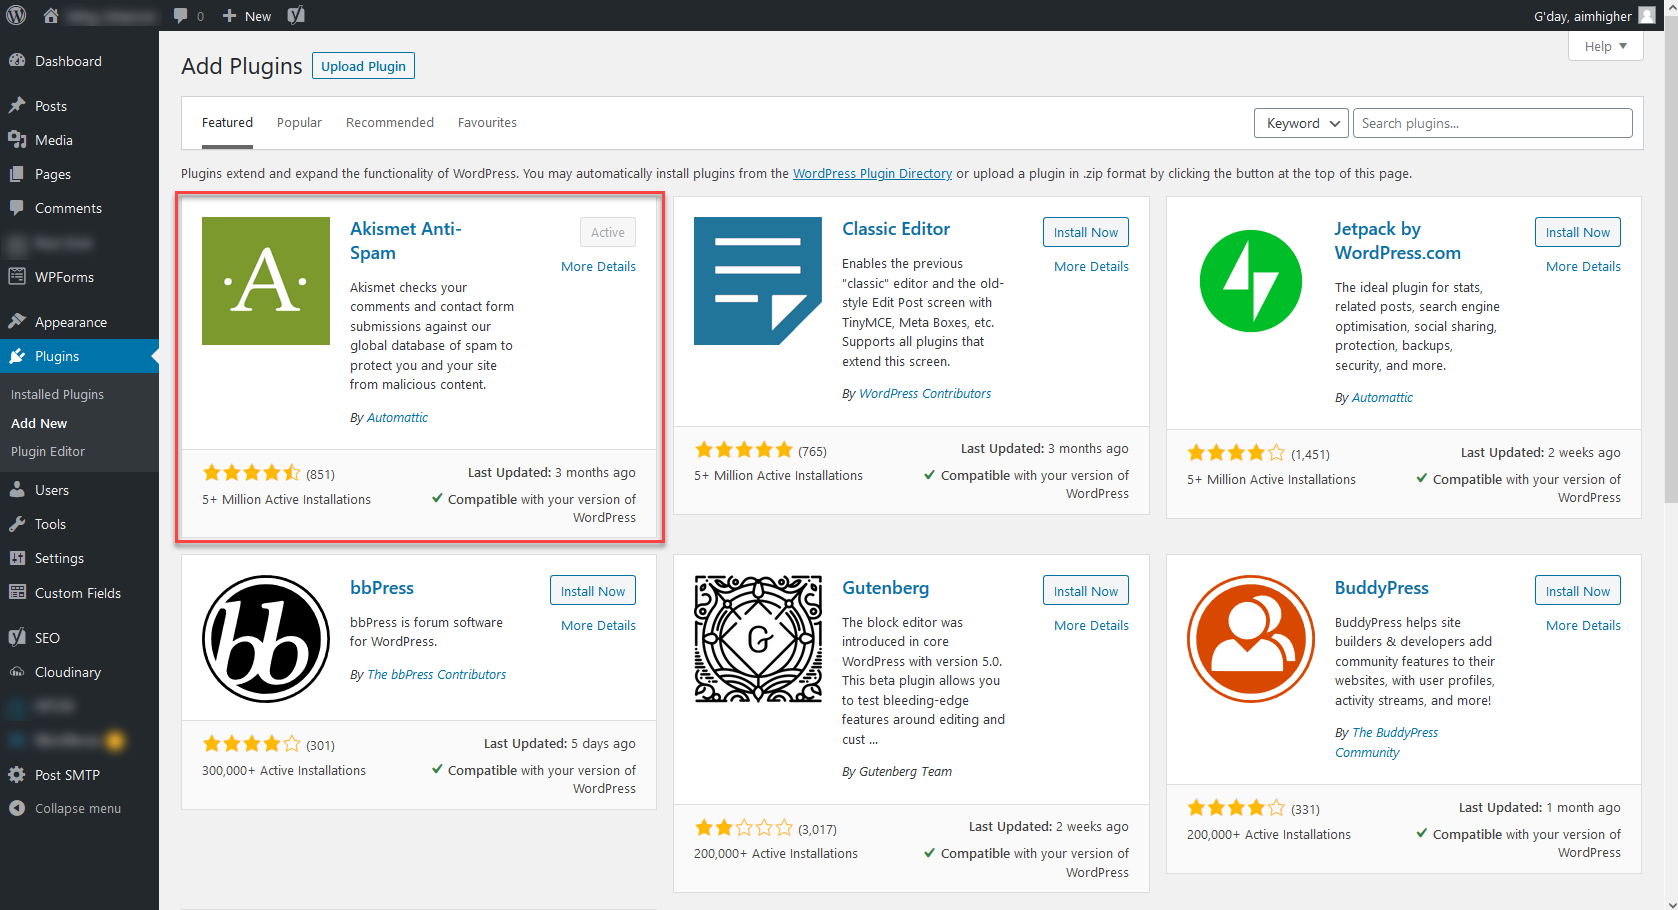
Akismet is the most popular spam plugin for WordPress websites (and is in the top 3 for most popular WordPress plugins) and it's there for a reason. It takes a couple of minutes to set up and from there it helps to filter out spam submissions for both your contact forms and any comment forms you have on your site. It may already be on your site, if not you can install it under Plugins → Add New in the admin side menu
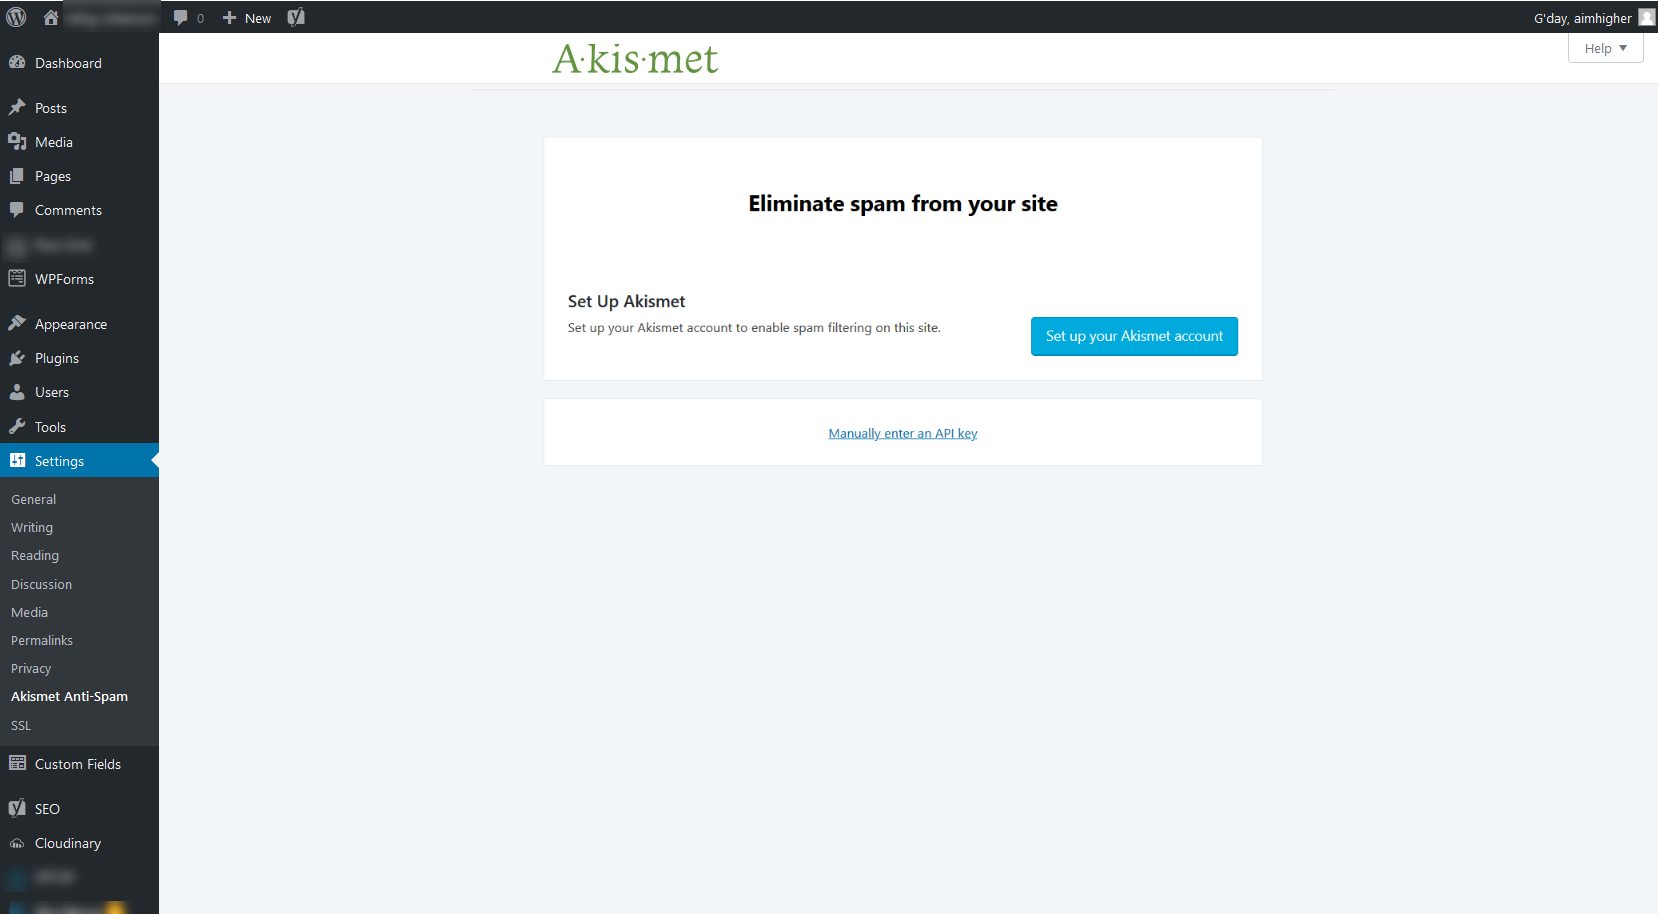
Navigate to Settings → Akismet Anti-Spam in the side menu and click Set up your Akismet account to register your website
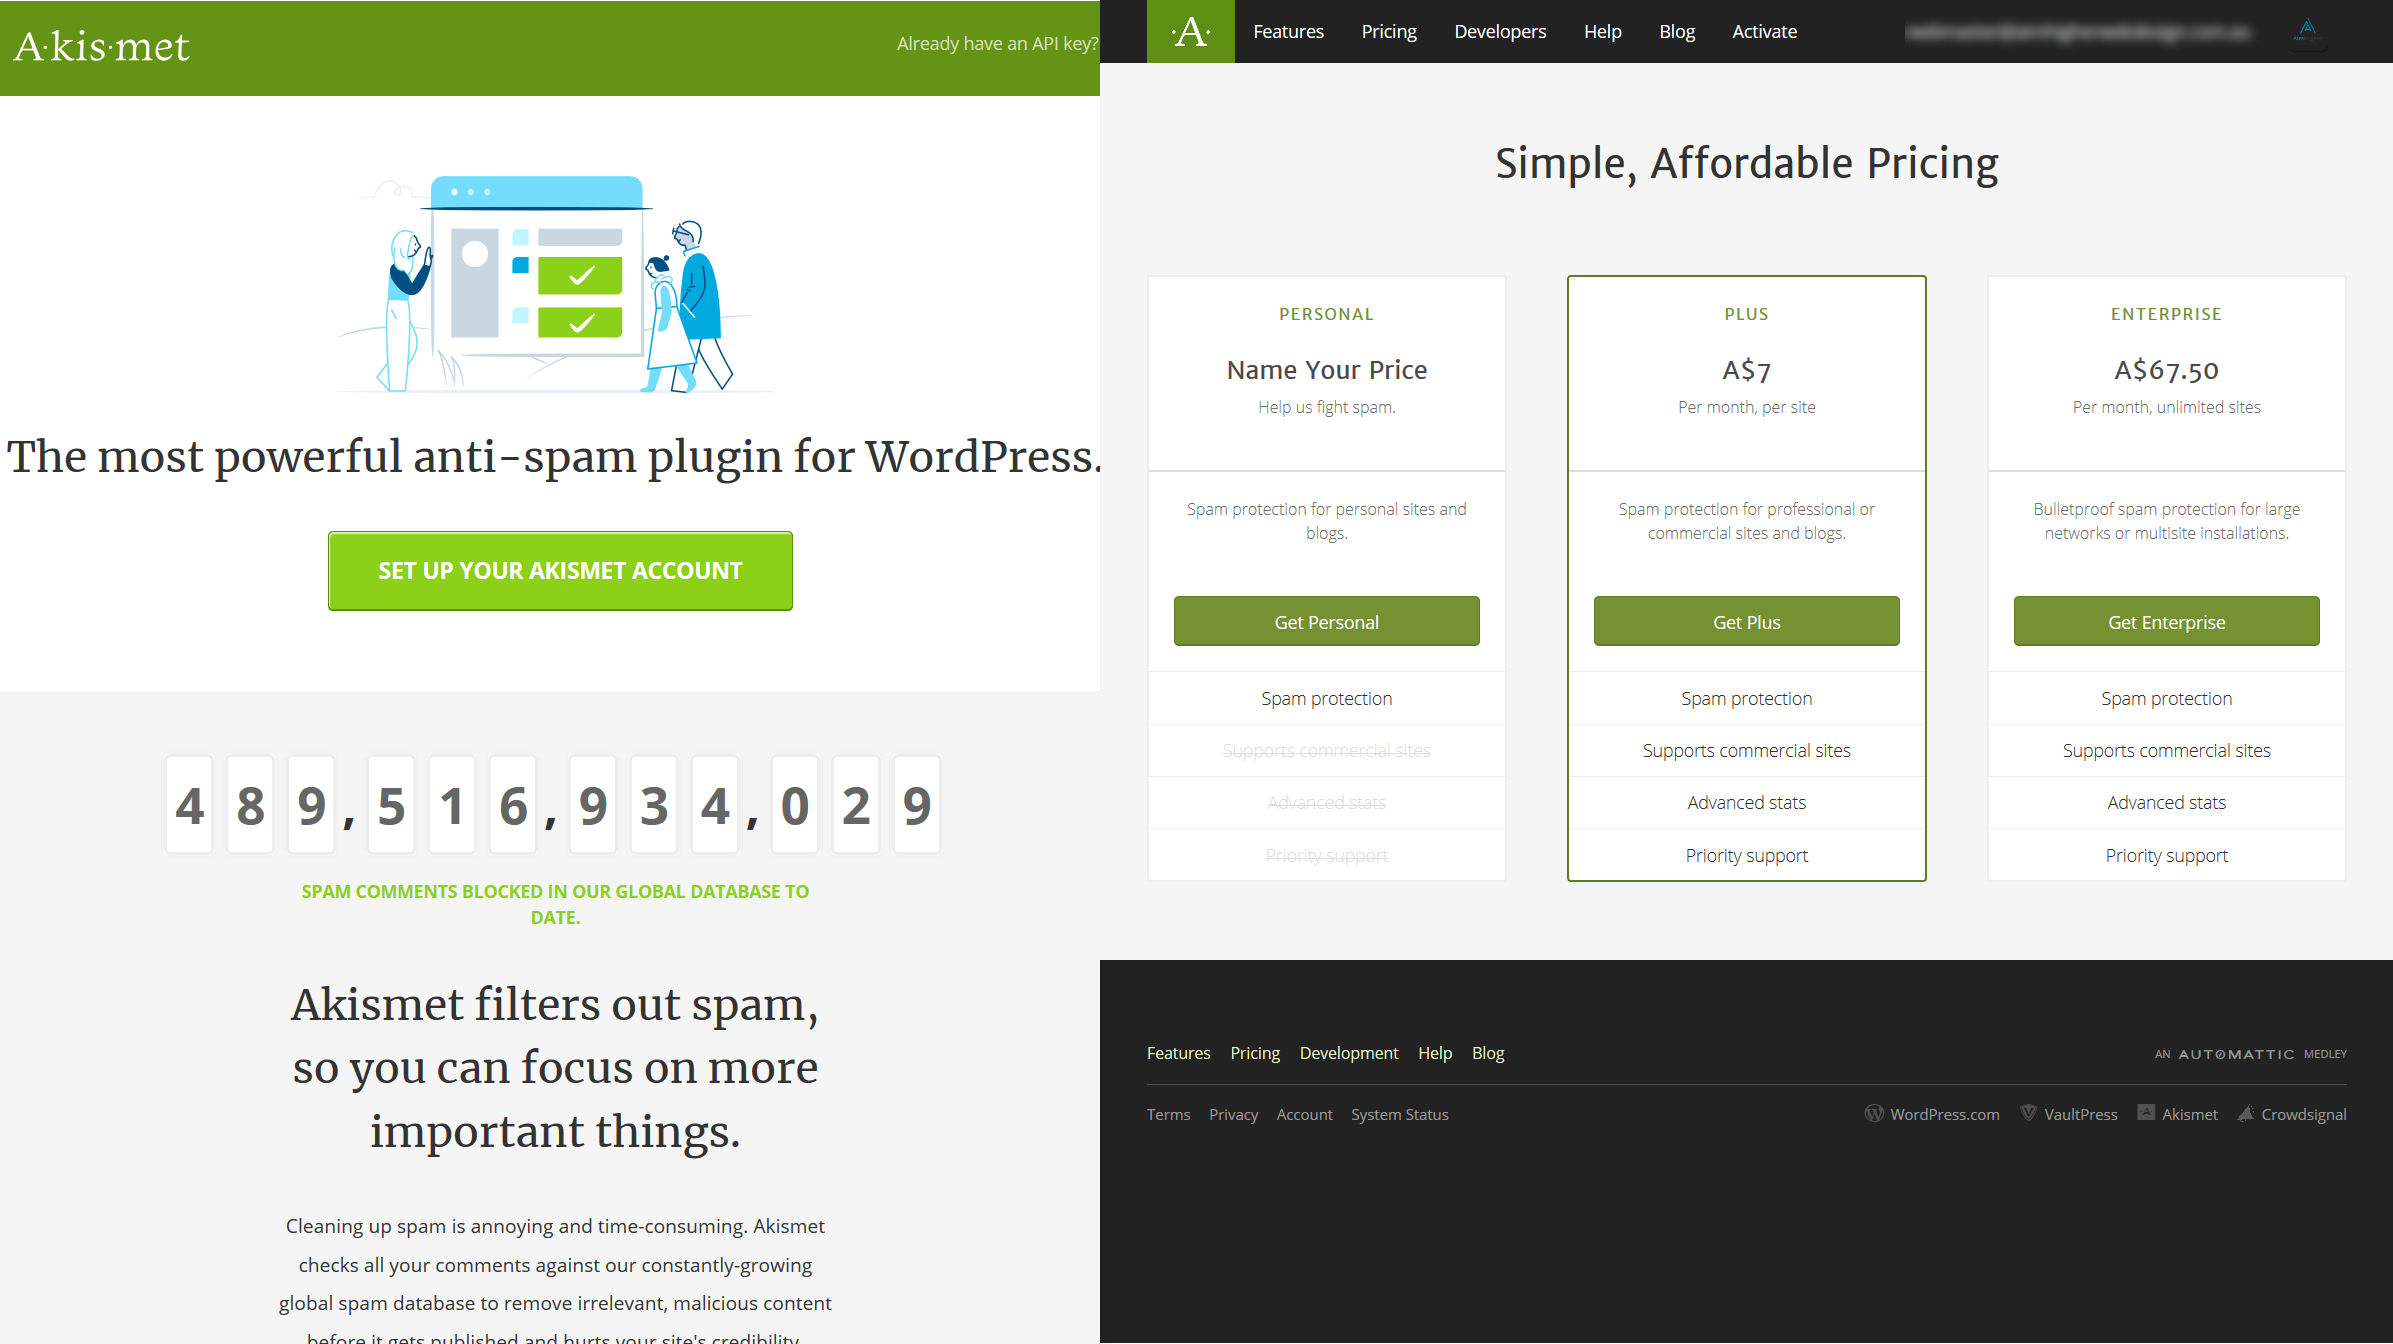
In the new tab, click Set Up Your Akismet Account, then select the plan you want to (if your site is only for personal use, the Personal plan should be fine, if your site is for a business then you need to have at least the Plus plan.
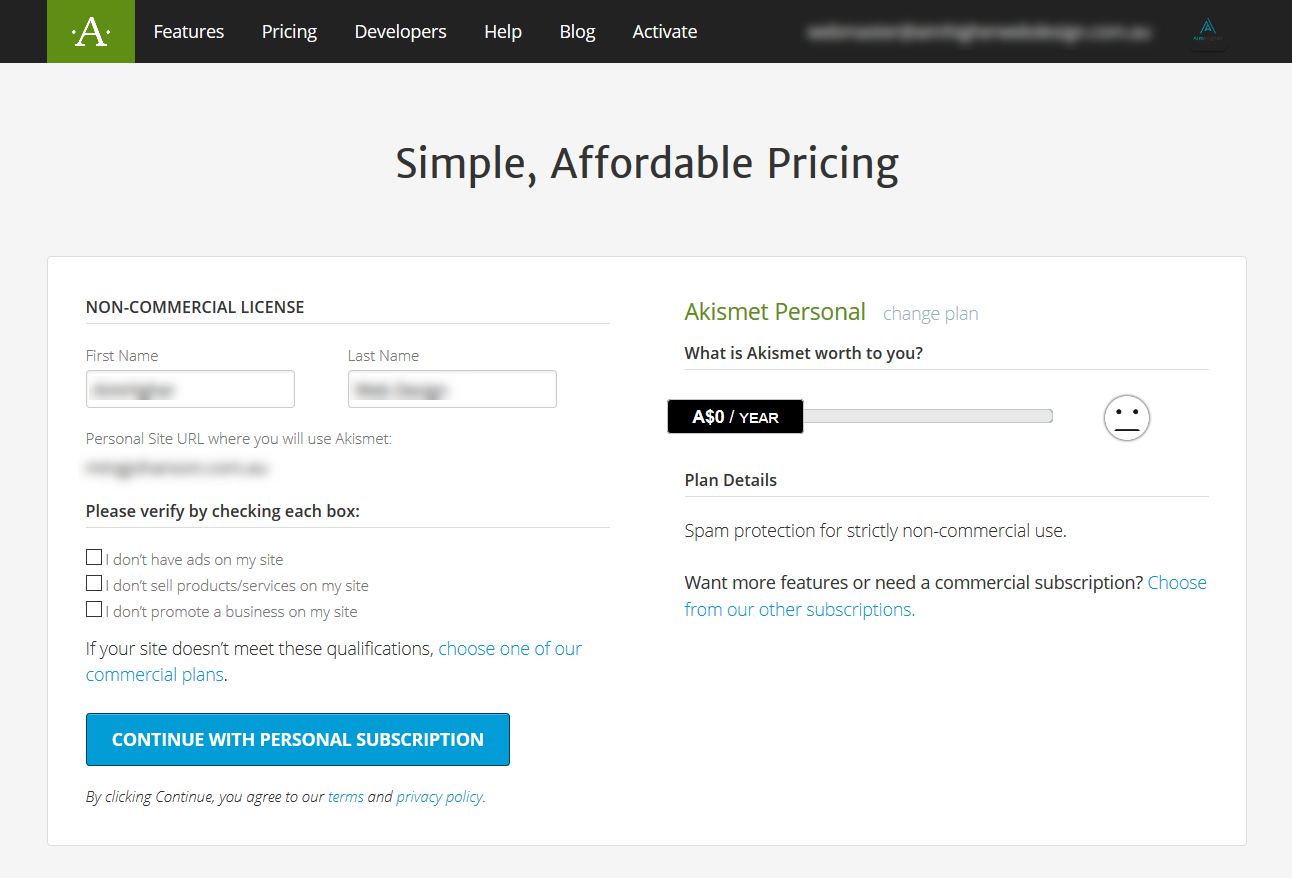
Once you've selected your plan, fill out your details and confirm your subscription (if you've chosen the Personal plan, you'll also be given the option to pay for it anyway).
Once you've filled out your details (and paid for your plan), you'll be given an API Key for your website
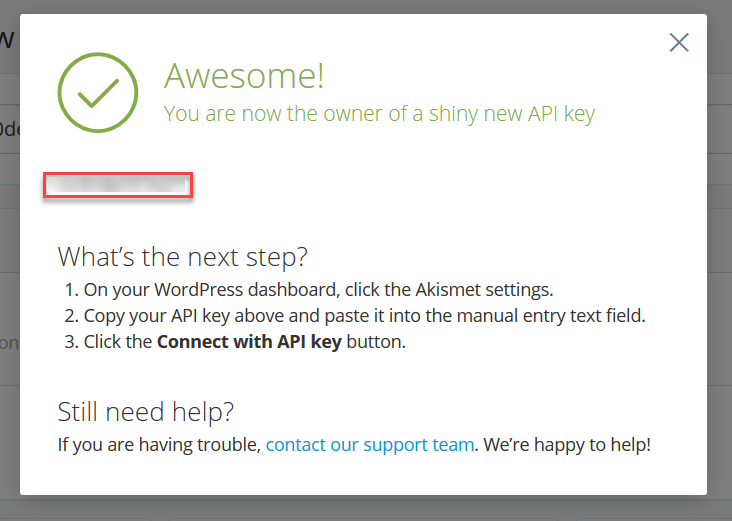
Copy the API key and paste it into WordPress under the Akismet settings then click Save Changes.
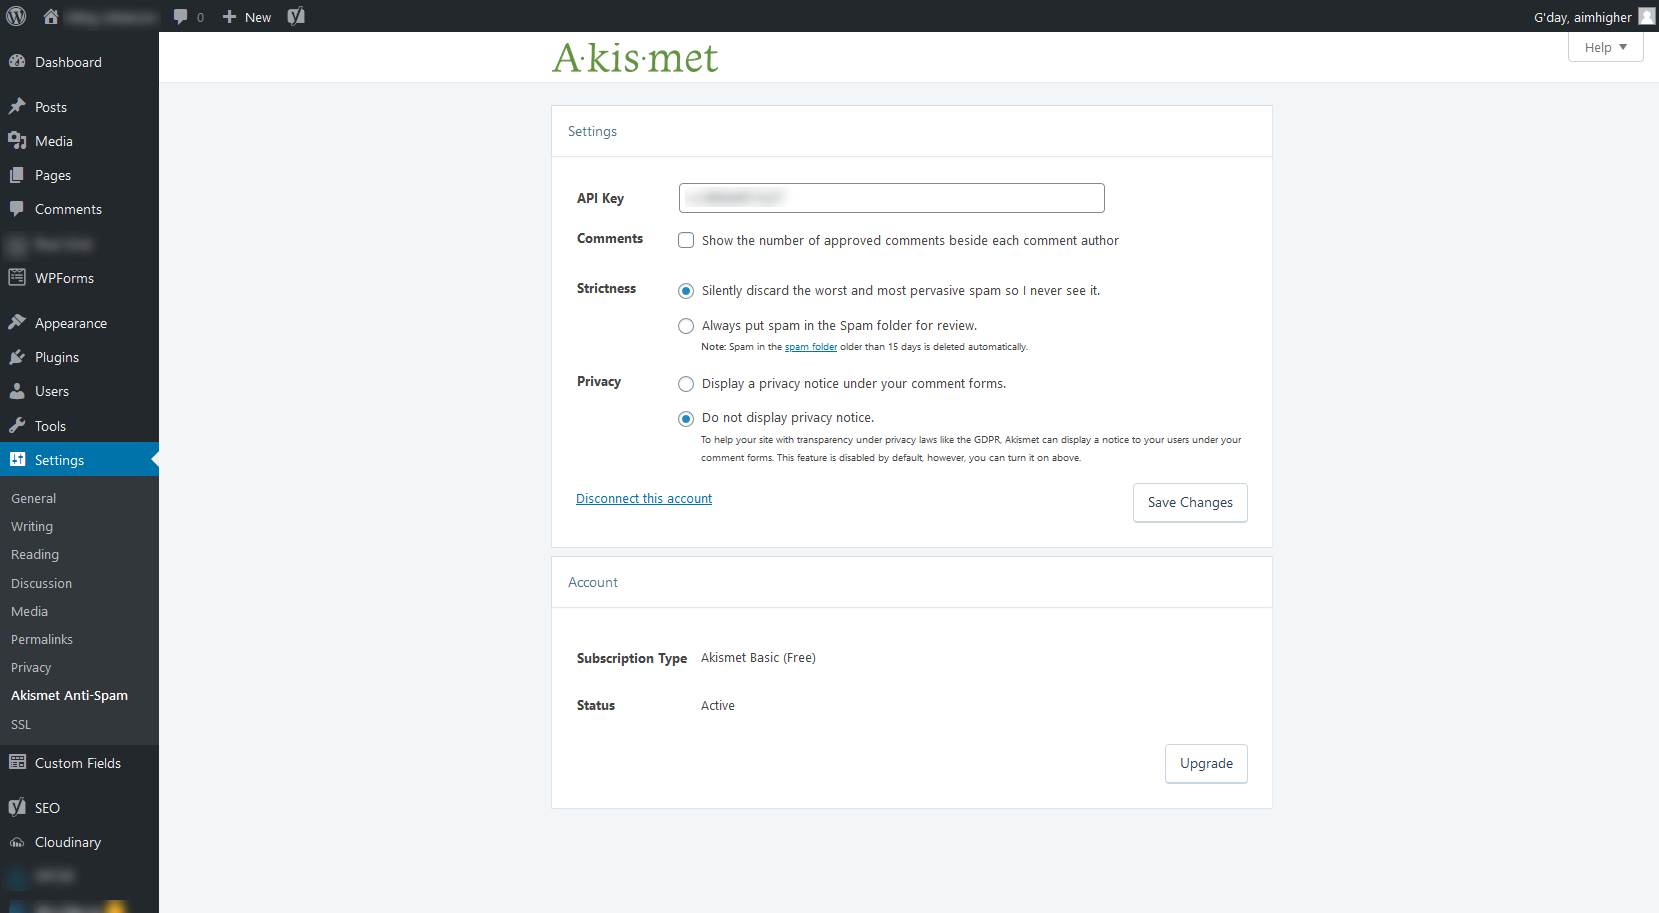
If you like, you can also change the settings here to define how strict Akismet is with letting spam submissions through.
Captcha for WP Forms
If Akismet isn't enough to stop the spam (or you want to stop it before it gets that far), you can also set up your contact form to show a CAPTCHA to help prevent bots submitting spam to your form. I use WPForms and Google reCAPTCHA, but there are many alternatives out there, this is a combination I've found works well and is easy to set up
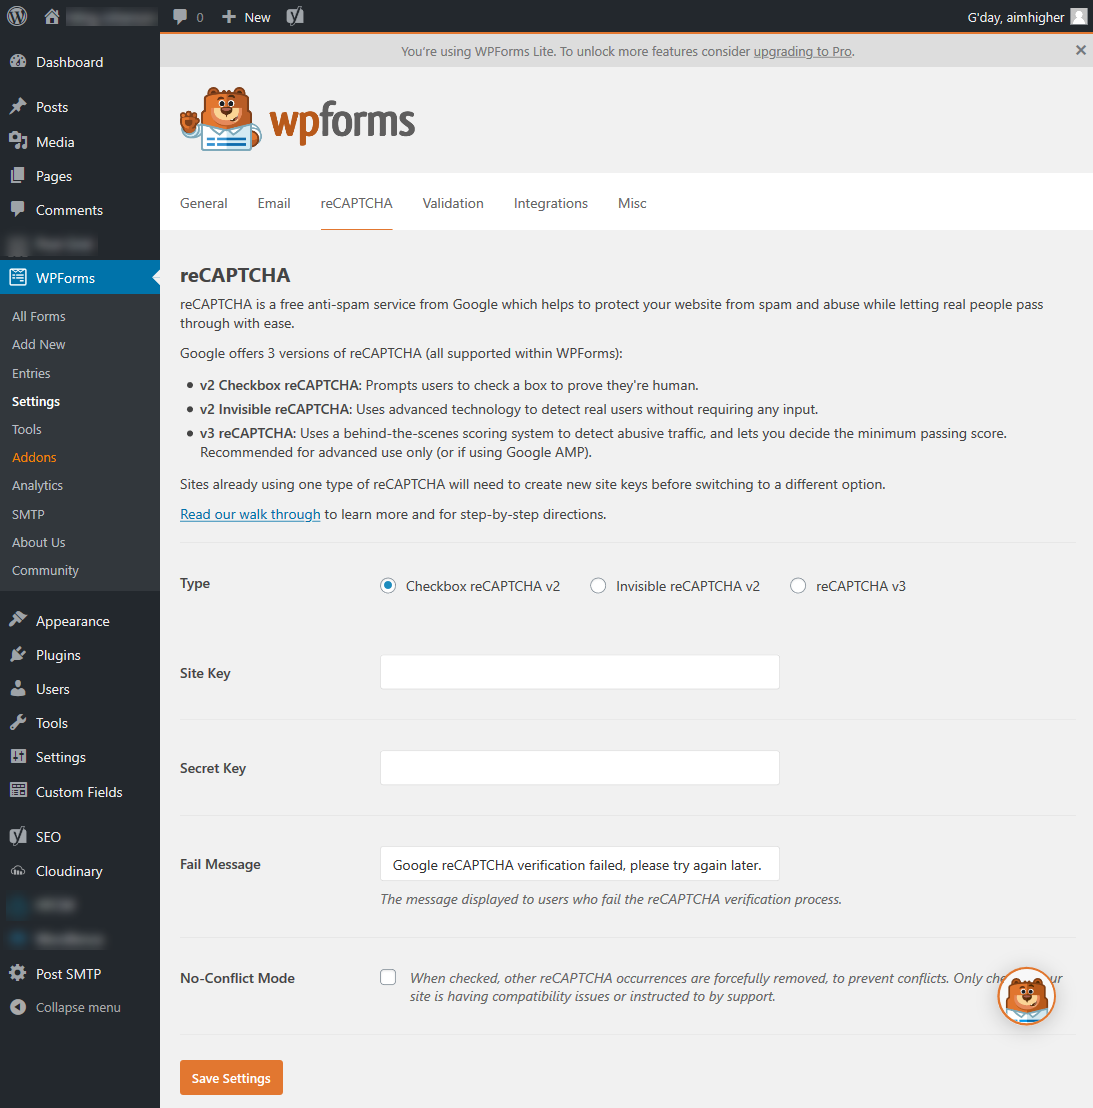
Under WPForms → Settings → reCAPTCHA, you have the options for setting up reCAPTCHA on your forms.
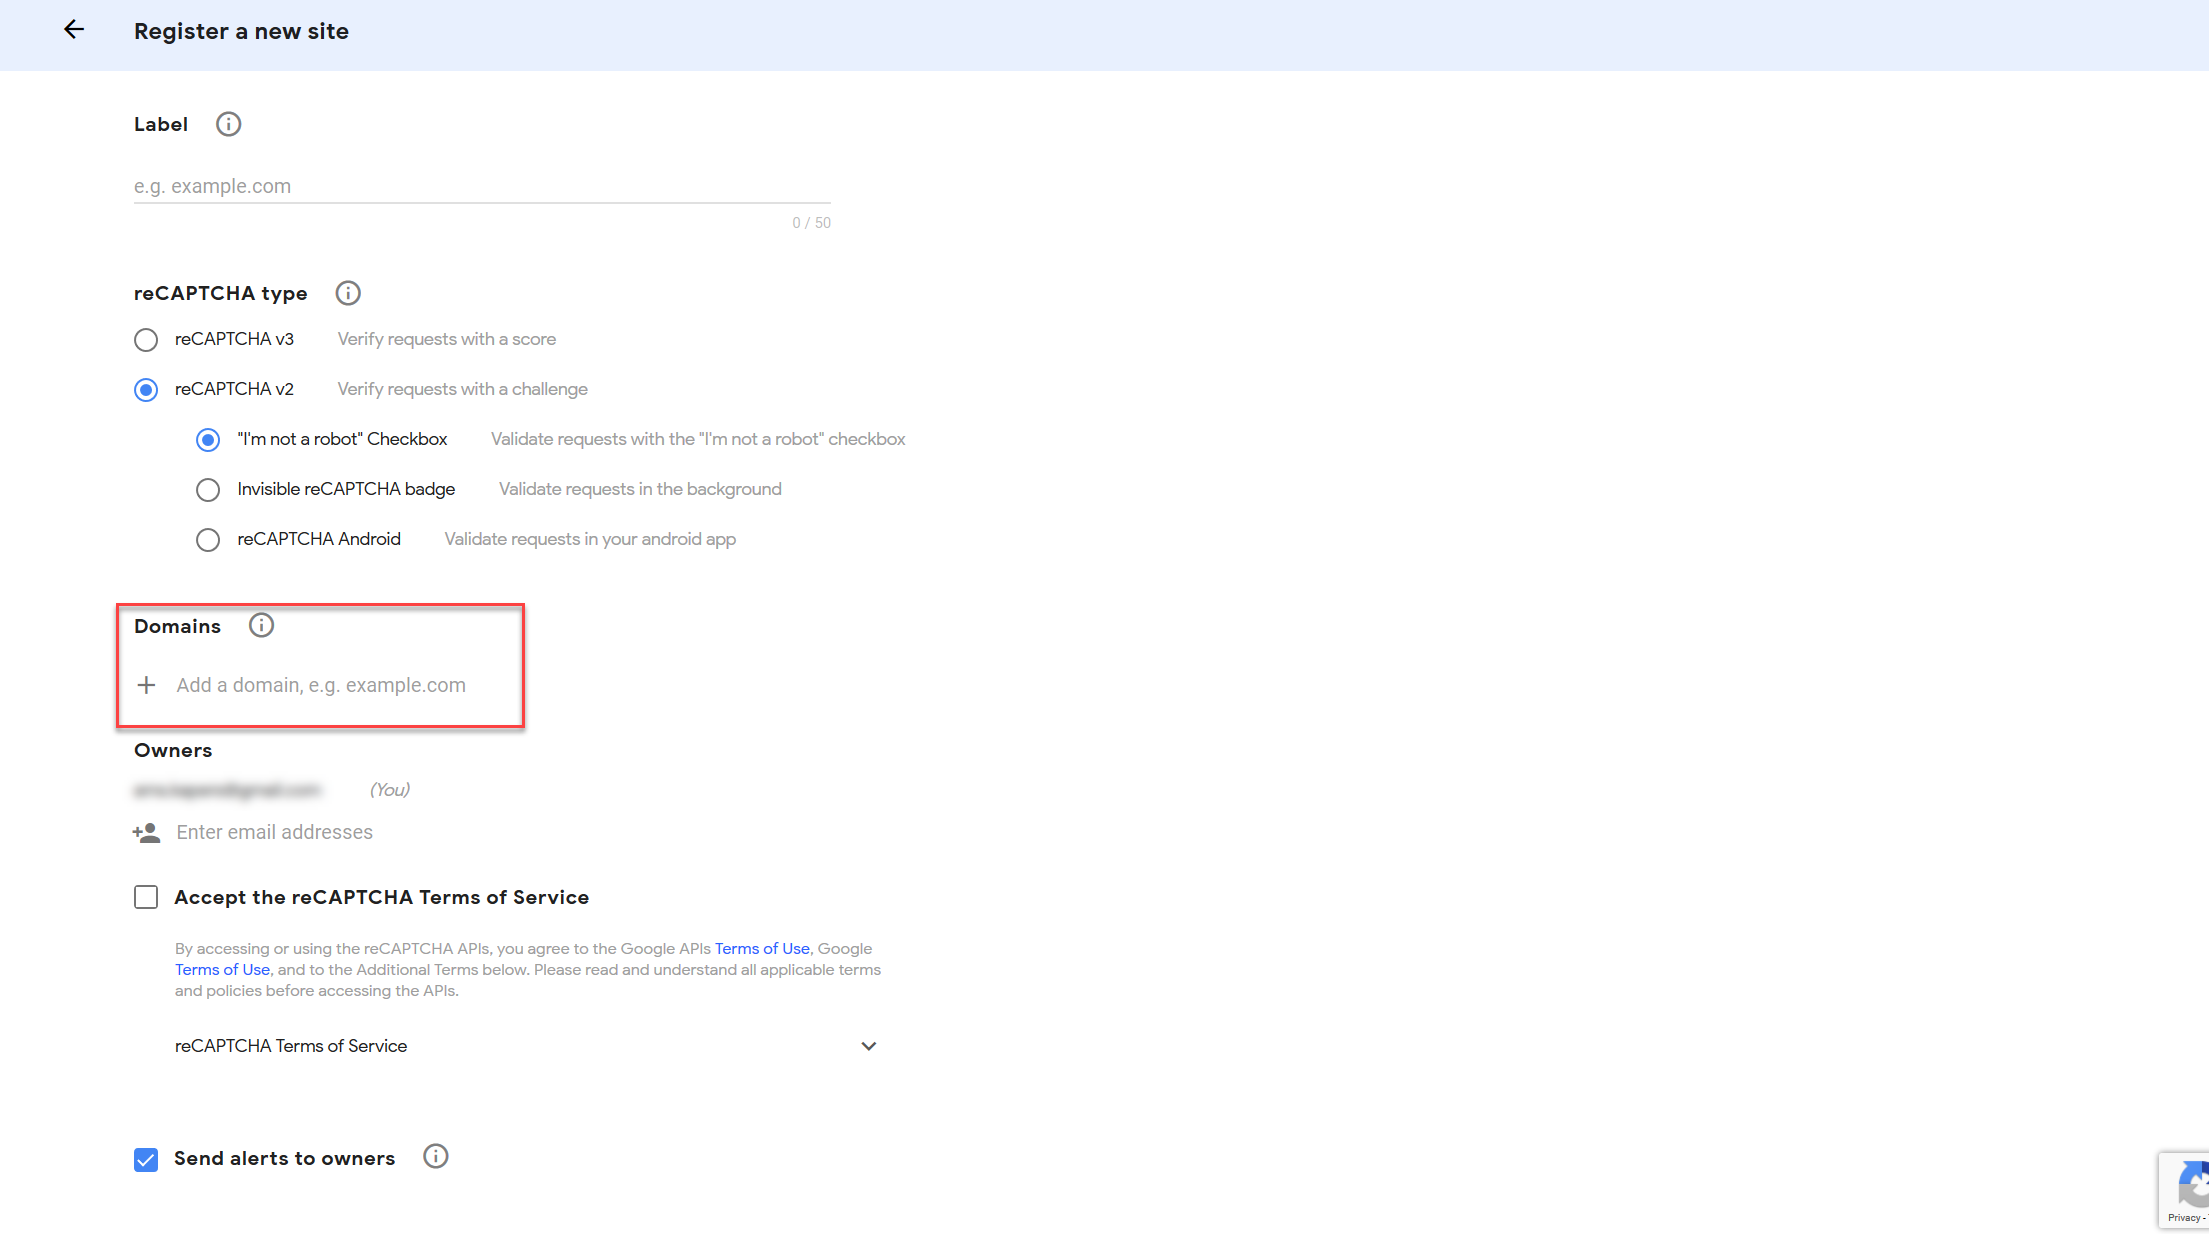
In a new tab, go to https://www.google.com/recaptcha/admin and login with a Google or GSuite account. It should prompt you to set up a new site and enter the details. Make sure you enter a domain under the Domains section (and if you have a test or development site, enter that too). I prefer to use the reCAPTCHA v2 checkbox option, but you can also choose the v2 invisible badge if you prefer. The v3 still has a few issues, so I'd recommend against using that for now. Once you've filled in your site's details, click Submit at the bottom
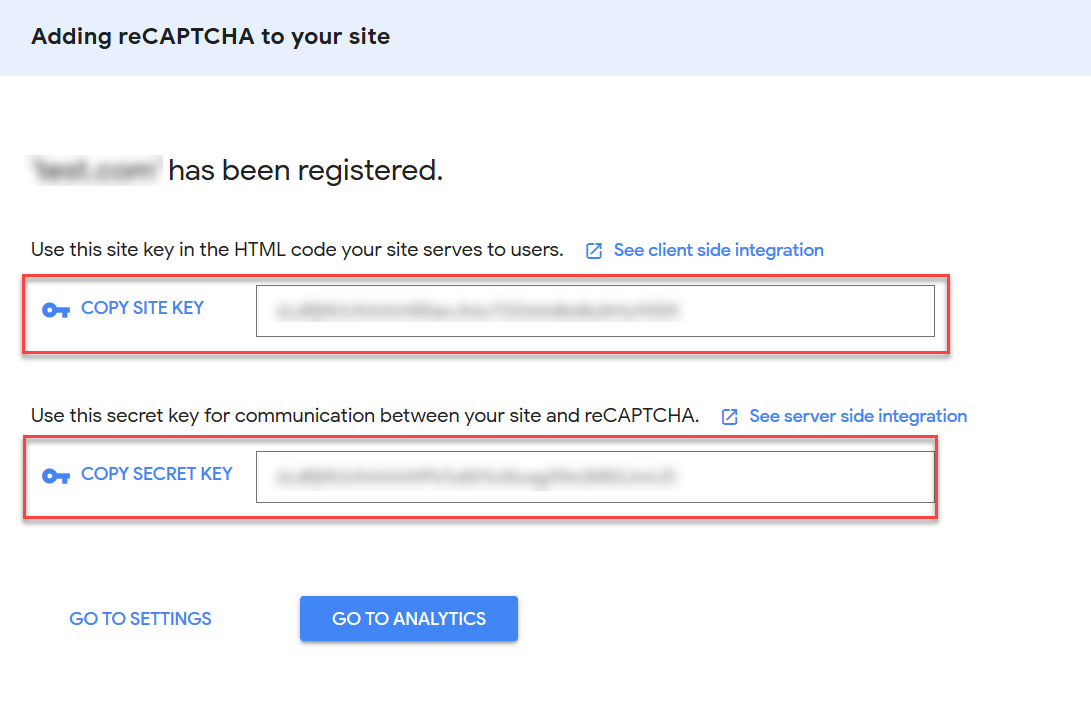
It will then give you two keys to add the reCAPTCHA to your site, a Site Key and a Secret Key.
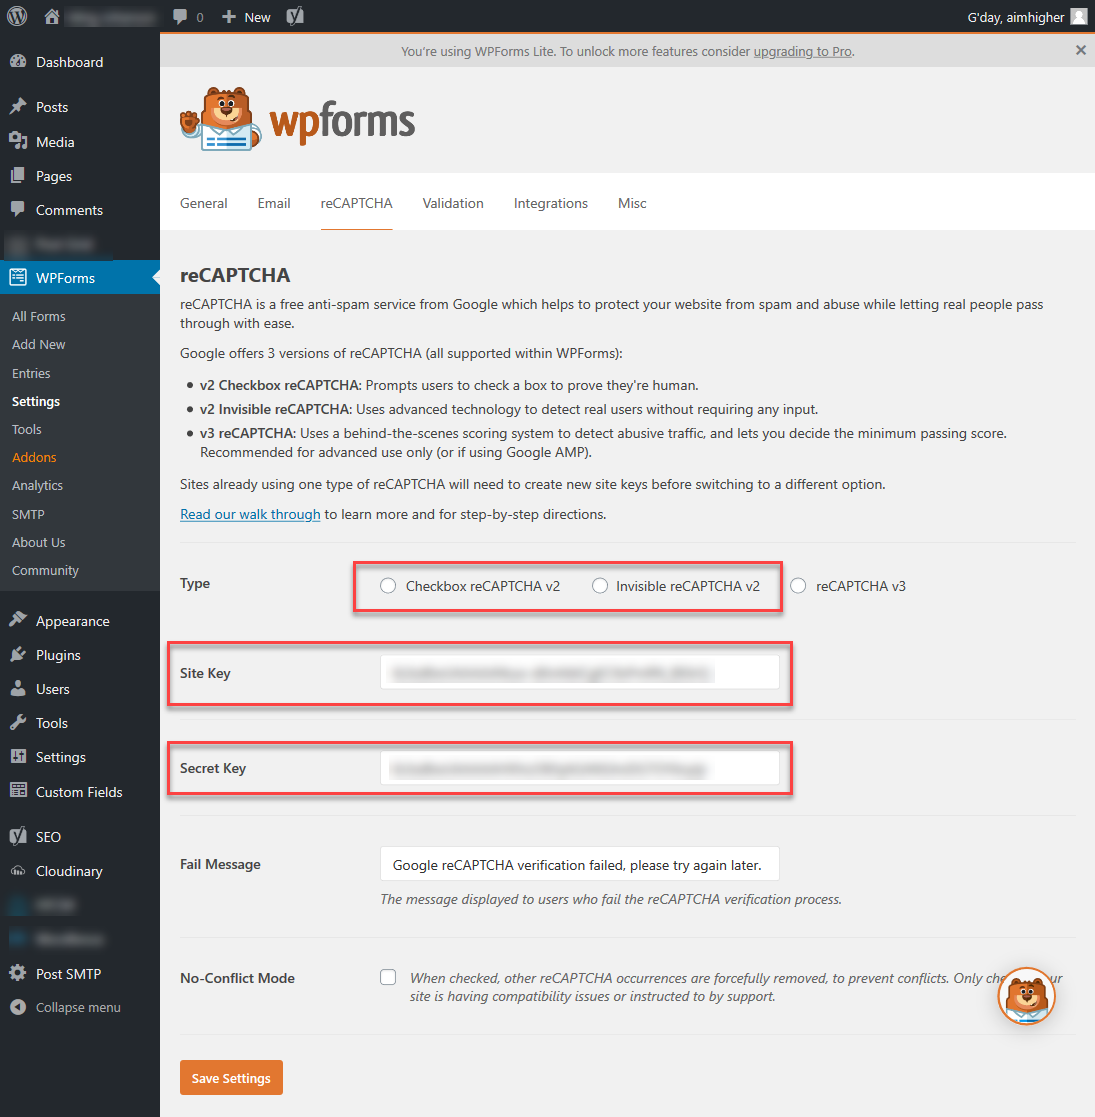
Back in WordPress, copy and paste the Site and Secret keys from Google into the fields for WPForms. Make sure you select the correct reCAPTCHA type that you've chosen with Google (checkbox or invisible) and click Save Settings.
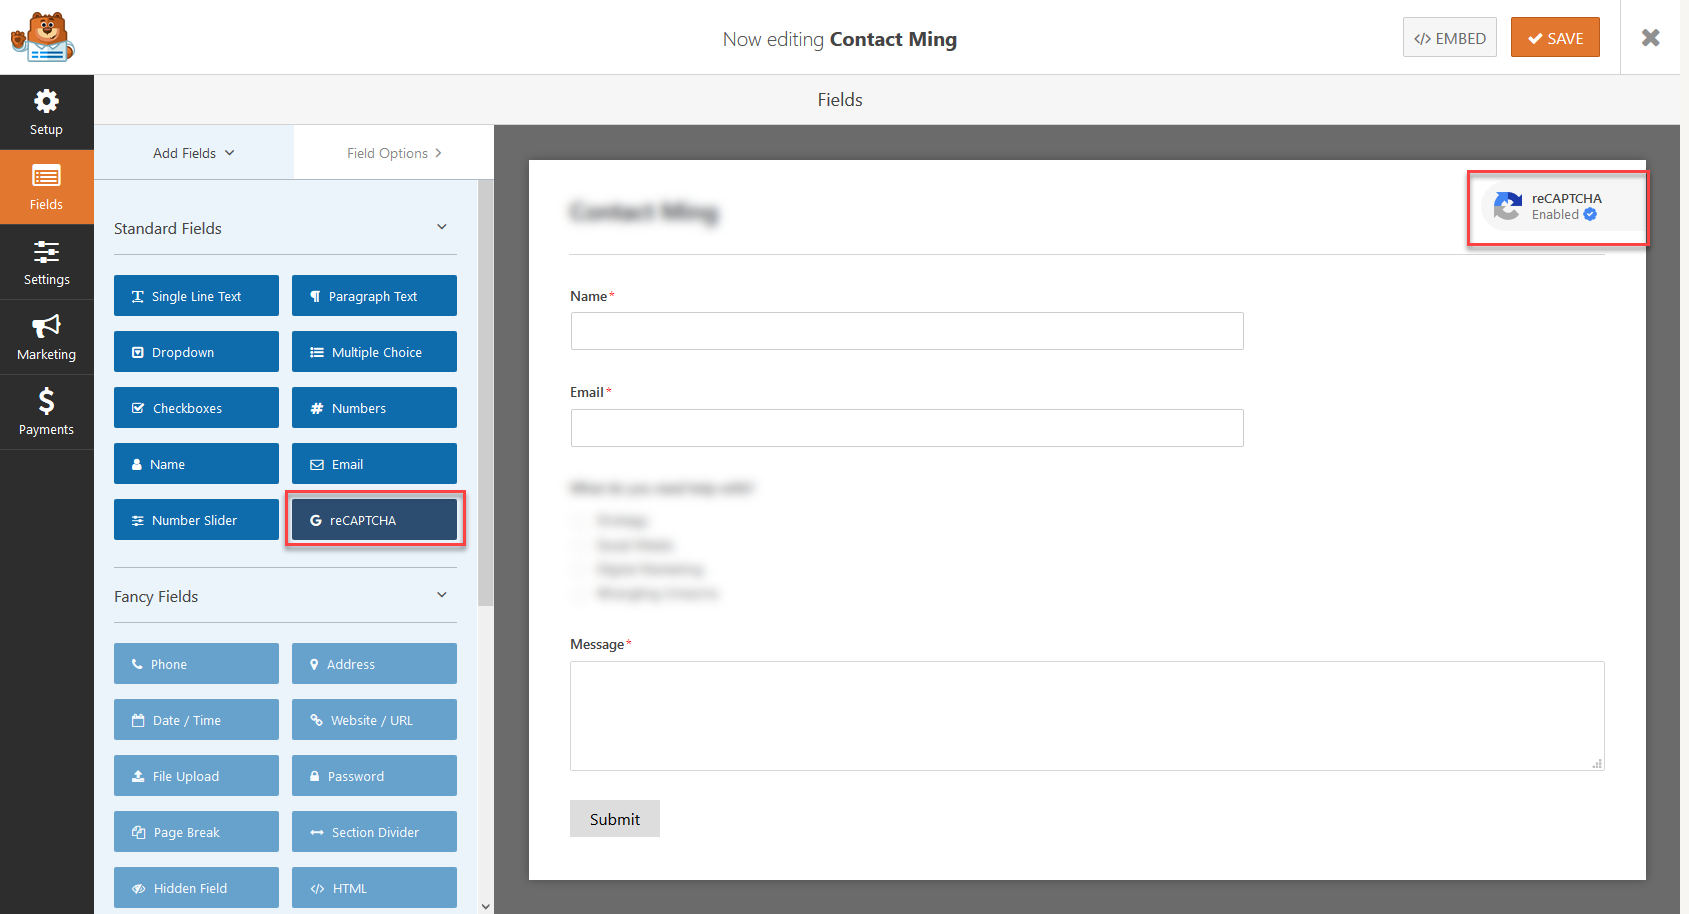
Under WPForms → All Forms, click to edit your contact form. Under the fields on the left hand side, click on the reCAPTCHA field, this shouldn't add anything to the form, but you will see a reCAPTCHA Enabled badge in the right top corner of your form. Click Save and exit the editor.
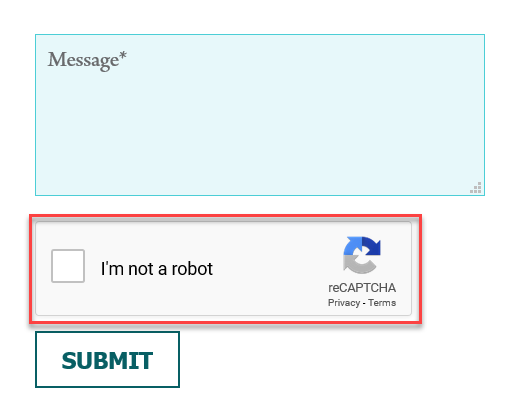
When you load your form, you should now have a reCAPTCHA appearing at the bottom, and form submissions won't submit unless it's been checked (if you have the invisible checkbox, it may not appear every time).
